 There are three schools of thought on proper sprinkler winterization. You could spend all day on the internet reading hundreds of articles, but all of them base their opinions on what Rainbird and Hunter suggest. The crazy thing about these 2 sprinkler experts is their answers are extremely different.
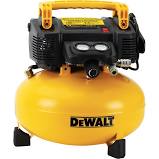
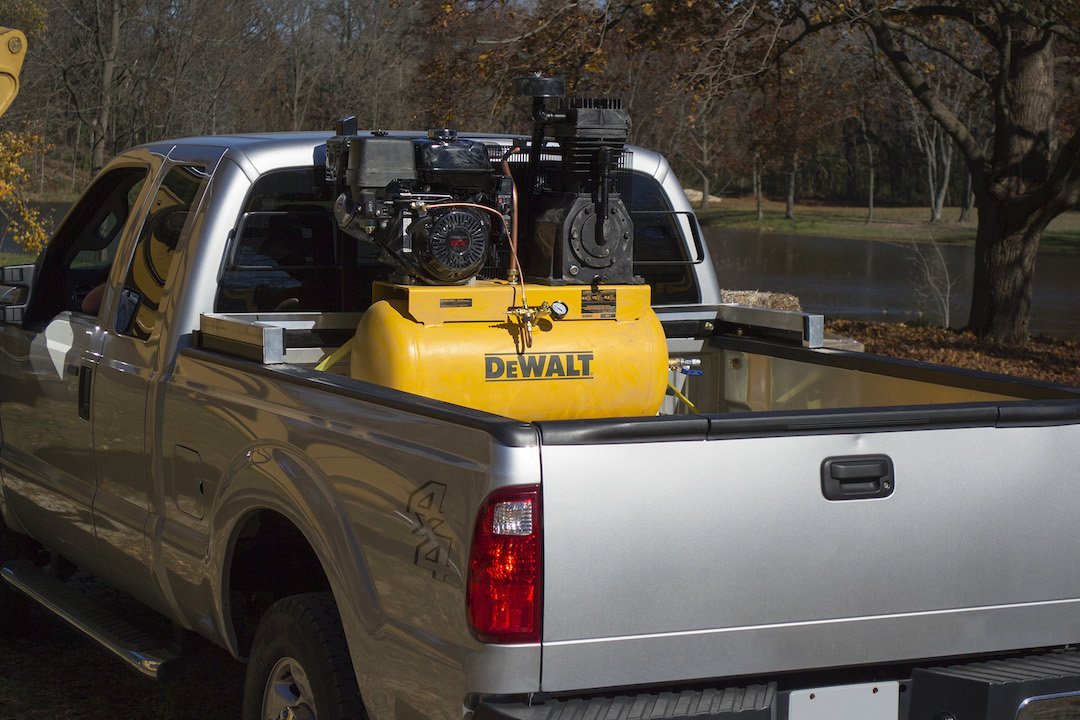
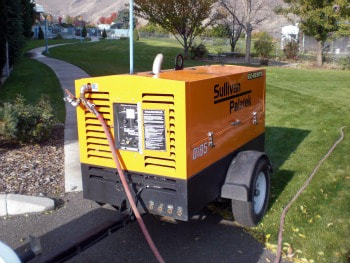
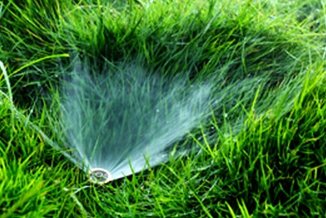
Rainbird suggests that air pressure (PSI) should not exceed 50 and your CFM (cubic feet per minute) should range from 10-25. Air volume should be high and air pressure should be low. Hunter on the other hand suggests that your air pressure should not exceed 80 PSI and 80-100 CFM. This will clear lines faster than rainbirds suggestion, but has long term impacts on your system. One of the main things that both companies agree on is that a 1-3 HP air compressor will not do the job efficiently. These small compressor can turn a ½ hour job into an all day ordeal. The main problem being that air heats up when run through a compressor for extended periods of time. Heat as you can imagine is hard on plastic pipe and rubber seals. A compressor should not push air through any pipe for more than 2 minutes at a time. So with this information what can one deduce? Air volume should be high and air pressure should be low. Now, I’ll introduce the 3rd school of thought a few landscape professors came up with the ideal answer. Find out what your water pressure is and how many gallons per minute your system was designed for. Then take your GPM and divide it by 7.5 and that will give you your CFM. Clear as mud right? During winterization season you will see landscape companies driving around with tow behind air compressors. These compressors at a minimum push 175 CFM and can run 150 PSI. Does anyone see a problem with that? Most sprinkler pipes are rated for 120 PSI for cold water. Hot compressed air acts different in pipes than cold water. This can lead to pipes bursting out of their joints and rubber in backflows and valves can melt or warp. I have seen the top of sprinkler heads blow off and shoot 30 feet straight up and I have scars to prove it. I have also seen the gears in rotors strip out because they were rotating so fast. The reason behind using these tow behind compressors is they blowout water fast, while this may be a good thing for the company's bank account it may not be so great on your investment. Now that we have powered through all that info, here is my recommendation. Since most homeowners don’t have a copy of their sprinkler plan to figure out the optimal CFM for your system. (It can be done without your plan, but I find it’s not necessary.) A 6-10HP gas air compressor that can push 10-25 CFM is what you need and what we use. Each valve should be opened for no more than 2 minutes. The air from the compressor needs to be shut off in between valves otherwise that hot air we talked about is pressurizing your mainline, backflow and valves. After all zones have been blown, cycle through again and double check for excess water. This process may take 5-10 minutes longer than the typical company but we put customers before fast profits.
0 Comments
 Winterization season is upon us!! That dreaded time of the year when temperatures drop and pipes begin to freeze. Clients often ask us if winterization is necessary. Sprinkler systems are an investment and like any investment, maintenance is necessary. Sure, you can drive you car with old dirty oil, but eventually your engine will fail. A $40 dollar oil change has turned into hundreds or thousands in repairs. We always suggest protecting your investments. A frozen backflow preventer or cracked valves and manifolds can cost you $200-$400. Digging up your front yard to chase cracked pipes can be just as costly, sometime these repair can range into the $1,000’s. While many homeowners choose to blow out their system on their own, there are several reasons why we suggest hiring a professional. First, this can quickly become an all day process. Winterization requires large capacity air compressors with an air flow rate between 80- 100 CFM (cubic feet per minute). Small, 1-3 gallon consumer air compressors will not be able to push enough air through your system. This being the case you will constantly have to shut down and recharge your sprinkler lines. Improper winterization may result in melting or exploding your sprinkler pipes and heads, if your PSI is to high. If it’s too low your pipes may freeze. Because of the complicated nature of this process, we recommend contacting an irrigation professional to have these services performed
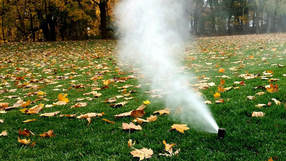
 Water experts believe that “half of the water applied to lawns is wasted”. Keeping your lawn green can be expensive, but it doesn’t have to be. The majority of people in Utah water their lawn 4-5 times a week, but studies have shown that watering fewer days with deep penetration is healthier for roots. The Sprinkler Repair Guy has adopted a technique used by Utah State University and Waterwise Utah. This simple technique will train your grass roots to respond to infrequent watering, which means savings for your bank account and a healthier lawn. Most lawns in Utah only require an inch a week and an efficeint sprinkler system should put 1” on your lawn in 6-12 minutes with only 2 days of water per week in the Spring. Summer will require more time. Follow the dates outlined below and adjust as needed. May- June 15th…... 1 inch per week June 16th- July 15th….1 ½ inches per week July 16th-Aug 15th...2 inches per week Aug 16th Sept….1 ½ inches per week Call us today to start your "Root Training Plan"
 .Spring is here! Freezing temperatures are on the decline and it's time a good time to turn on irrigation systems and make sure it is functioning properly. You do not need to begin watering just yet, but as temperatures continue to rise so does our demand. If you intend to perform your own Spring start-up, you should take a few very important steps to make sure you do not damage pipes or irrigation components. It is always best to hire a professional contractor, but if you’re a do-it-yourselfer. We have provided a spring start-up guide below to help ensure your system is up and running with ease and efficiency.
STEP 1 Turn on your main water supply to your system Open the system main water valve slowly to allow the main line to the backflow to fill with water gradually. If these are opened too quickly, the line is subjected to high surge pressures, uncontrolled flow and water hammer, which may cause your pipe or backflow to crack or burst. Check for leaks then move on to step two STEP 2 Open Backflow Preventor Open the backflow slowly to allow the main line to fill with water gradually. If the check valves are opened too quickly, sprinkler main lines are subjected to high surge pressures, uncontrolled flow and water hammer, which may cause them or your valves to crack or burst. STEP 3 Open valves one at a time Verify the proper operation of each station valve by manually activating all zones from the controller. STEP 4 Run sprinklers from timer Walk through each station on the controller, checking for proper operation of each zone. Check for proper operating pressure (low pressure indicates a line break or broken sprinkler), proper rotation and adjustment of sprinkler heads, and adequate coverage. Check and clean filters on poorly performing sprinklers. Adjust heads to grade as necessary STEP 5 Adjust timer Reprogram the controller for automatic watering. Replace the backup battery if necessary. STEP 6 Uncover and clean the system weather sensor, if applicable. Remember, it is always best to hire a qualified professional contractor when performing tasks like Spring Start-Up. Irrigation contractors are experts in hydraulics, proper sprinkler system layout, plant watering requirements and soil types. Their skills will ensure a water-efficient system and years of trouble-free operation. Book a Spring Start-up before April 15th for $50 |